DIY memo holder tutorial

I saw some little photo holders in Tiger when I was browsing last month, and felt inspired to make my own! So todays little DIY is so simple and the perfect way to display little notes or photos on your desk. I’m always writing lists and memos on various scraps of paper, and these are perfect to keep them together instead of getting lost in between various junk on my desk. These are really simple and quick to make – the hardest part is waiting for clay to dry!
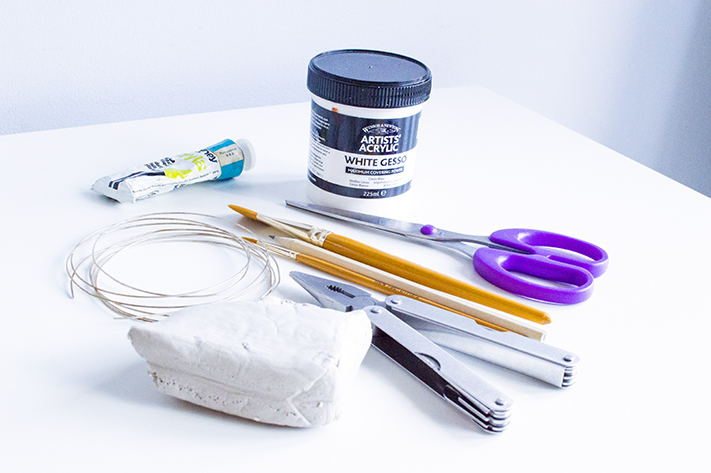
Supplies
You will need:
Clay
Pliers
Paint
Paintbrushes
Pencil
Glue (optional)
Wire

Step one - Mould your clay
I used air dry clay so left mine to dry over night, but you could definitely use baking clay like Fimo if you want, and it will save you from painting later on, too. You can go for whatever shape you like, but make sure the bottom is nice and even so it can stand on its own. I went for a simple cube and a house shape, and be sure to use water to mould the clay to try and get the sides as even as you can.
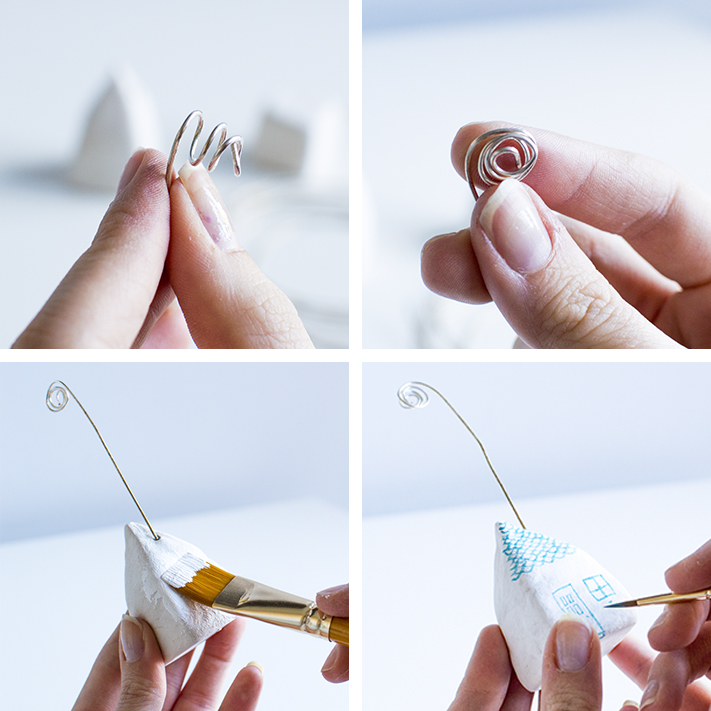
Step two - Make the wire holder
Cut a length of wire, and with your pliers, fold the end of the wire around on itself to start the curl. I used a pencil to wrap the wire around on itself starting from the pointed end and then along the barrel. You’ll be left with a spiral, and then just squish it in to itself to make it flat. You’ll only need a small spiral for the memo holder, so be sure to leave a good length straight for it to stand into the clay.
Step three - Pop it all together
Use the straight end of your wire to poke into the clay. Go about 3/4s of the way into your clay shape so it’s nice and secure. You can leave this in the clay whilst it dries, or you can let it dry without it in and then glue it into your clay shape once it’s completely dried.
Step four - Decorate
Now for the fun part! You can go with any colour theme to match your desk and any pattern you like. I painted my clay white first, because the airdry clay I used has a slightly grey tint to it. For the simple cube, I dunked it into some watered down turquoise paint to give a subtle dipped effect. For the house, I used a very small paintbrush but you can also use felt tip pens like sharpies to make the process a little easier.
You can glaze your shapes if you want a finished, shiny effect but I was too eager to use them! They’re a great little DIY to brighten up your desk. If you make these yourself, I’d love to see so please tag me on Twitter or Instagram with your creations!
