How to start a travel sketchbook
The great big beginners guide
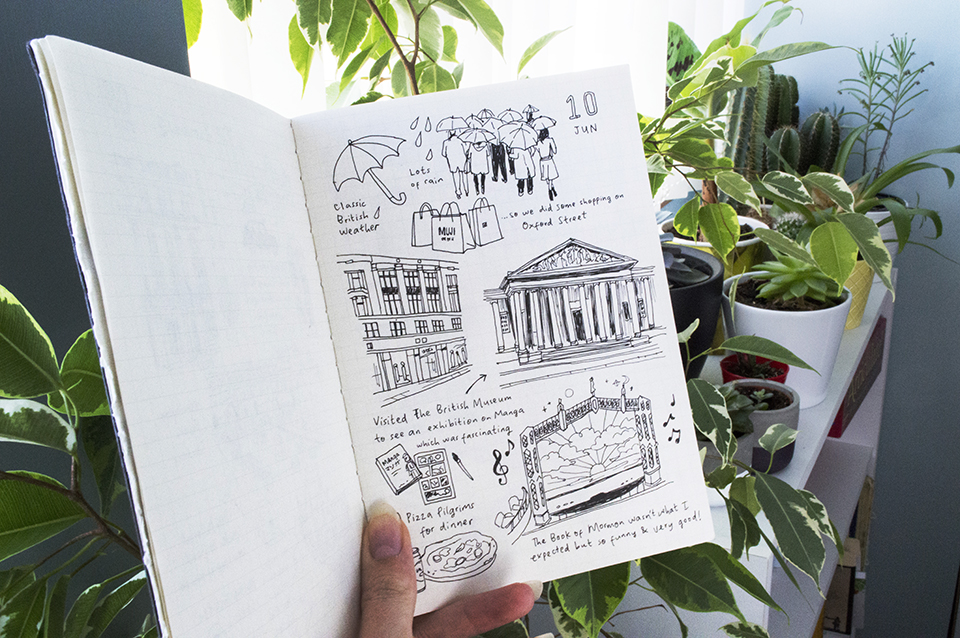
This year, I started documenting my holidays and travels in a mini sketchbook. It’s just a small MUJI notebook but I’ve been loving translating my holiday into a creative outlet. Pairing sketches with little annotations and snippets of trips gives a much deeper, personal insight into travels around the world as well as those closer to home.
As you’ll know if you follow my blog or Instagram, I’m a huge advocate for documenting memories. Usually that’s art journaling or scrapbooking and using photos to showcase what I’ve been up to.
For a travel sketchbook though, you’re simply armed with paper and a pen. It’s simple, easy to carry when travelling and needs the most minimal equipment and outlay to start.
In this blogpost, I’ve outlined some pointers for starting your own, and shared some tips I’ve picked up along the way.
On location
Drawing on location is amazing and memorable but not always possible. It might be raining, way too busy, too open, or you just don’t feel comfortable yet.
If you want to, go for it! Bear in mind that people love watching other people draw so you might have guests peering over your shoulder. It’s a great conversation starter if you’re looking to start chats with locals or test your language skills.
Use your photos
There’s nothing worse than feeling pressured to draw. Sometimes the moment isn’t right or you’re just having a bad drawing day. This sketchbook isn’t a replacement for your holiday snaps, so take photos and use them as reference.
I’ve often drawn from my photos in the airport waiting for the flight home, or in a coffee shop taking a minute from the busy tourist streets to draw the view I saw earlier that day.
Catch up later
And, with that in mind, you don’t even need to do your sketchbook while you’re on a trip. If you’ve got a packed itinerary and have no time, but you’d still love to create a sketchbook, do it after!
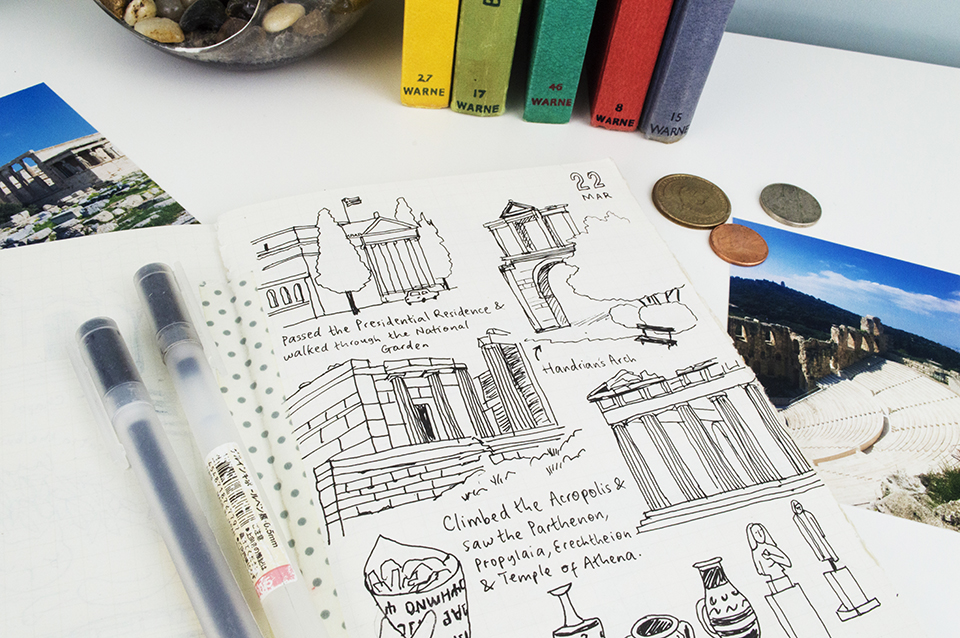
My Athens pages were done back in the hotel after each day, but my Barcelona trip still hasn’t even been finished in my sketchbook, and I visited in June! This is why it’s so important to still take photos and not put pressure on yourself to draw there and then. It takes the fun out of it, and there’s nothing wrong with creating your sketchbook later, using your own visual references.
They are still your memories, plus it’s a great excuse to relive it and go back through your photos a few weeks/months after the trip. It also means that there’s no time like the present to start a travel sketchbook! We all take photos and have albums for each holiday, so use those as a starting off point and go from there.
Take the minimum
A super thick, very heavy, large sketchbook is the last thing you’ll want to be lugging around in your bag. If you’re planning on drawing on location, or even if you need every space of luggage to bring back treats and souvenirs, I recommend a small, lightweight sketchbook and a pen or two.
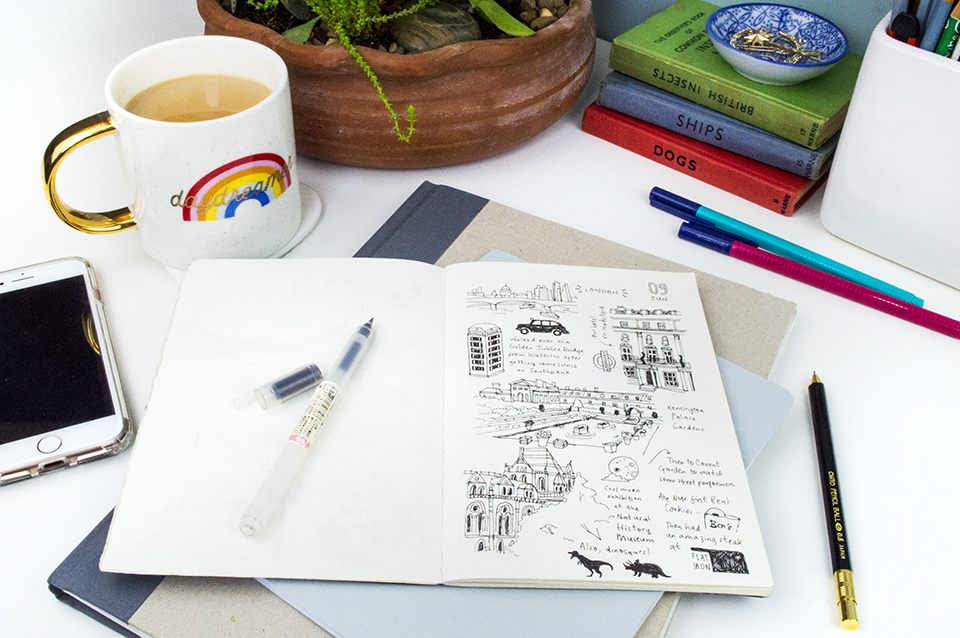
I love the MUJI 0.5mm ink pens and it’s what I use for my travel sketchbooks, but you can use pencil or biro, or any other tool you prefer. I’d limit it though - you don’t need a huge pencil case full of tools that you’re not going to use. Likewise with colouring – you absolutely don’t need to take a bag full of felt tips, coloured pencils and tubes of paint.
You can get mini watercolour palettes and even sets specifically for travelling (with tiny brushes and a little bottle for paint water), but generally I find that if you want to add colour, it’s easier to do at home anyway.
I totally understand it depends on art style but I really recommend starting simple if you’ve not created a travel sketchbook before. You can always create more complex sketchbook pages as you get used to keeping them and become a seasoned pro as you go, but you don’t want to become overwhelmed and put yourself off by being too ambitious on your first try.
Start small
On a similar note to the above, carrying around a large format sketchbook isn’t only impractical, but also a little daunting!
Even now I find the first page of any notebook or sketchbook scary, and I have hundreds of the things. A big white space is hard to fill as it is, let alone if it’s A3! I’m currently using an A6 one but I think I might upgrade to A5 for next year’s travels.
A6 has definitely been the perfect size for me to start off with but depending on your itinerary, it could be a little small to fit everything in. That being said, you could always fill multiple pages for each day instead of struggling to fit it all on one.
The sketchbook I use is from MUJI, is gridded and the paper is relatively thin, but it’s extremely lightweight and easy to carry. I’m only drawing on the right hand page anyway, but if you want to use every page of your sketchbook, then I would test it before you go to check if the pen you’re going to use doesn’t bleed through. I didn’t plan on making it a long term project at the time and I was surprised with just how much I enjoyed it, so next time I’ll definitely go for plain paper and a thicker stock.
The thicker the paper then the heavier the sketchbook, though you wouldn’t need to worry about this at all if you’re only planning on using pencil!
Add writing
I have a terrible memory, so even if I’ve drawn the prettiest cathedral in the world on the page, there’s no chance I know what it’s called! Annotations and little notes are the best way to keep track of where you’ve been and what you’ve drawn, as well as adding a huge amount of personality to a page.
You can write as much or as little as you like – either turning it into a journal or diary page, or just an annotated picture to remind you when you look back through the sketchbook later on. I find it really useful to take photos of signs and information boards while taking my holiday photos so I know exactly what it is I’m photographing and later, drawing.
We stumbled upon a beautiful church walking back from Parc Guell in Barcelona and I’d have no clue how to find it on a map or what is was called if I hadn’t taken a phone snap of the display board while we were there.
Highlights only
Fitting every single activity, meal you eat and view you see into your travel sketchbook is going to be impossible. Highlight the places of interest, landmarks or buildings that catch your eye. If a particular place evokes a special feeling or is memorable, add that down. First time trying the national dish? Draw it! Add personal highlights as well as the usual touristy stuff. If you went shopping and found the perfect gift, outfit or trinket, you can add that too. This is your sketchbook with your memories, so curate it to suit. In years from now you may not remember these memories at first, and the sketchbook is a wonderful way to remind you.
Plus, one highlight may trigger another memory in your head, so don’t worry too much if you can’t get every tiny detail down. I like to fit each day on one page if I can, though if it’s a particularly full day and I have a lot of highlights to include, I’m happy to push it onto another page so I don’t miss anything out.
Page thumbnails
With Athens and London, I knew what I wanted to put on the page and where. With Barcelona though, there was so much I wanted to include and, again, I was a bit intimidated by the blank page. I didn’t want to mess it up and I also wanted to make sure I communicated everything I wanted to without running out of room.
Thumbnailing is a technique that is used by artists for testing the layout and composition before they start their ‘final’ piece. It’s a way of testing how things fit best and are simple thumbnail size sketches on scrap paper. They take hardly any time to do, and are a quick, easy way to test scale, size and location of all the different elements.
You don’t need to be super detailed here, just roughly map out the shape of the building or whatever it is you’re drawing, and see how it all fits together at various sizes. Create various thumbnails to see which layout works best before you then create the final page in your sketchbook. (If you’re drawing in the sketchbook as you go then you can skip this step!)
To sum up
I love my travel sketchbook, and hopefully this will inspire you to start your own too! It’s such a wonderful accompaniment to holidays – it’s not only a creative way for you to look back on your memories, but also something friends and family can look through, giving them a deeper insight that they wouldn’t see when flicking though a photo album alone.
If you decide to venture into the travel sketchbook world, I’ve love to see so please do let me know or tag me on instagram wherever you share your pages!
LIKE THIS POST? YOU MIGHT LIKE TO READ THESE: